Introduction: From Linear Waste to Circular System
Take a moment to consider the modern urban gardening cycle. It often looks something like this: We drive to the garden center to buy bags of soil and synthetic fertilizer to feed our plants. Then, we harvest our vegetables, and the nutrient-rich peelings, cores, and scraps from our kitchen—the very things that could rebuild that soil—get tossed into the trash. This waste goes to a landfill, and the cycle repeats.
It’s a linear system, and a fundamentally wasteful one. We are constantly taking resources in, and sending potential resources out. But what if you could break this cycle? What if your small patio or balcony could function like a miniature, self-sustaining ecosystem?
Enter the concept of the “Urban Permaculture Loop.” It’s a design principle that focuses on closing these wasteful loops, turning outputs (like food waste) into inputs (like fertilizer), creating a resilient and productive system right outside your door.
The key to unlocking this loop on your patio is simpler than you might think: a worm tower. This isn’t a large, smelly compost bin. It’s a simple, in-ground system—often just a section of perforated pipe—that you sink directly into a patio container or raised bed. Inside, a colony of hard-working worms acts as a live-in cleanup crew, silently transforming your kitchen scraps into vermicompost—the richest natural fertilizer on earth, often called “black gold.”
This guide will show you how integrating a worm tower completes the ecological loop on your patio, transforming it from a plot that consumes resources into one that creates them, resulting in a more productive, self-fertilizing, and resilient garden.
I. What is the “Urban Permaculture Loop”?
At its heart, permaculture is about working with nature, not against it. It’s a design philosophy that observes how natural ecosystems—like a forest or a meadow—function effortlessly and sustainably. One of its core principles is the idea of a closed-loop system.
A. Defining the Principle: No Waste in Nature
In nature, there is no “garbage truck.” Everything is a resource. A fallen leaf isn’t trash; it’s food for fungi and insects, which in turn become food for other creatures, and its nutrients eventually return to the soil to feed the tree again. It’s a perfect, circular loop where the output of one process becomes the input for another.
The “Urban Permaculture Loop” is simply our effort to mimic this brilliant, no-waste design in our own small spaces. It’s about looking at our patio gardens not as isolated plots, but as interconnected mini-ecosystems where we can turn our “waste” into our greatest resource.
B. The Patio Garden Loop in Action
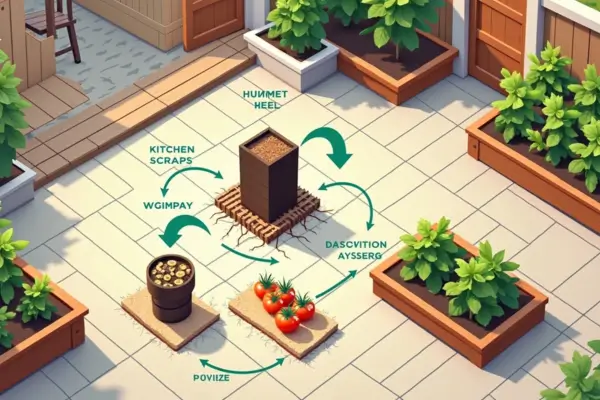
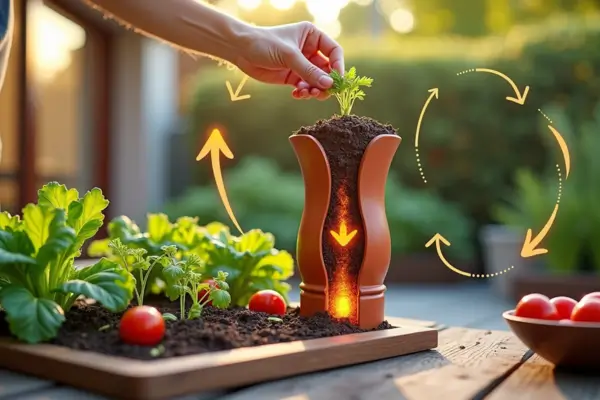
So, how does this elegant theory translate to your patio? Let’s break it down into a simple, four-step cycle:
- Input (The “Waste”): Instead of heading for the trash bin, your daily kitchen scraps—apple cores, potato peels, coffee grounds, and wilted lettuce—take a short trip outside to your garden. This is the fuel for the entire system.
- Process (The Alchemy): This is where the magic happens. You feed those scraps to the workforce living in your worm tower. Red wiggler worms and billions of beneficial microbes get to work, decomposing this organic matter through a process called vermicomposting.
- Output (The “Black Gold”): The worms transform your scraps into two incredibly powerful resources:
- Vermicompost (Worm Castings): A nutrient-dense, odorless soil amendment that is pure plant food.
- “Worm Tea”: A nutrient-rich liquid that seeps into the surrounding soil, acting as a powerful, natural fertilizer.
- Result (The Reward): Your plants, now fed by this constant supply of the world’s best fertilizer, become healthier, more vigorous, and more productive. They reward you with a more abundant harvest of vegetables and herbs… which, of course, generates more kitchen scraps.
And just like that, the loop is closed and the cycle begins again. You are no longer a consumer of gardening inputs, but a manager of a thriving, self-renewing ecosystem.
II. Why a Worm Tower? The Benefits for the Urban Gardener
You might be wondering, “Why a worm tower? Can’t I just use a regular compost bin?” While traditional composting is fantastic, the in-ground worm tower offers a suite of unique benefits that make it the undisputed champion for the city dweller.
A. Space-Efficient Recycling Forget the large, rotating compost tumbler that demands precious square footage. A worm tower is vertically oriented and sits directly inside your patio container or raised bed, taking up virtually no extra space. It’s a self-contained recycling center that fits perfectly on a balcony, a small patio, or even in a tiny courtyard garden, turning spatial limitations from a challenge into an advantage.
B. On-Demand, Free Fertilizer Stop the cycle of buying plastic bottles of synthetic plant food. A worm tower provides a direct line of the most potent, all-natural fertilizer known to gardening—vermicompost and “worm tea.” This isn’t a harsh chemical; it’s a gentle, slow-release elixir that feeds your plants exactly what they need, when they need it, right at the root zone. Your garden fertilizes itself, for free.
C. Supercharged Soil Health The benefits go far beyond basic nutrients. Worm castings are a miracle soil amendment. They:
- Improve Soil Structure: They bind soil particles together, creating a crumbly, ideal texture for root growth.
- Enhance Aeration and Water Retention: This improved structure allows roots to breathe more easily while also helping the soil hold moisture more effectively, meaning less watering for you.
- Introduce Beneficial Microbes: Castings are teeming with life, inoculating your soil with a protective army of microbes that keep it vibrant and healthy.
D. Natural Pest & Disease Resilience A plant growing in rich, living soil is like a person with a strong immune system—it’s naturally more resilient. By consistently feeding your plants with the output from the worm tower, you build their inherent strength, making them less susceptible to pest attacks and common plant diseases. You fight problems not with sprays, but with superior soil health.
E. The “Set-and-Forget” Factor Unlike a compost pile that needs turning and monitoring for temperature and moisture, a worm tower is remarkably low-maintenance. Once it’s established with a healthy population of worms, your job is simple: add scraps every few days and ensure it doesn’t dry out. The worms do all the hard work underground, making it the ultimate “set-and-forget” composting solution for the busy urbanite.
III. Building Your Patio Worm Tower: A Step-by-Step Guide
Ready to build your own in-ground composting powerhouse? The process is simple, inexpensive, and can be completed in an afternoon. Let’s gather your materials and get started.
What You’ll Need:
- The Tower: A section of 4- to 6-inch diameter PVC pipe (most common) or a food-grade plastic bucket.
- Tools: A power drill with a 1/4-inch to 1/2-inch drill bit. If using PVC, a saw to cut it to length.
- Materials:
- A handful of small stones or gravel
- Cardboard (unwaxed)
- Bedding material: Coco coir (highly recommended) or shredded, non-glossy newspaper
- The stars of the show: Red Wiggler worms (Eisenia fetida). Do not use earthworms from your garden; red wigglers are composting specialists.
The Build:
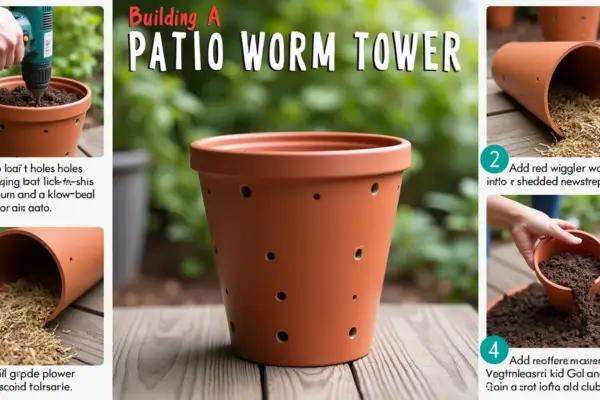
Step 1: Prepare the Tower This is the most important step. Using your drill, create numerous holes (about 1/4 to 1/2 inch in diameter) all over the bottom 2/3 of your pipe or bucket. Drill holes generously along the sides as well. These holes are the “doors and windows” for your worms to travel in and out and for moisture and nutrients to migrate into your garden soil.
Step 2: Choose the Perfect Spot Select a central location within your patio container or raised bed. Avoid placing it right against the edge. You want the worms’ nutrient-rich castings to benefit as much of the soil volume as possible.
Step 3: Dig and Create the Drainage Layer Dig a hole deep enough to bury at least two-thirds of your prepared tower. Before placing the tower in, toss a handful of gravel or small stones into the bottom of the hole. This creates a small drainage sump to prevent the very bottom from becoming waterlogged.
Step 4: Install the Tower Place your drilled tower into the hole, ensuring it’s sitting steadily on the gravel layer. Backfill the space around the tower with the soil you removed, patting it down gently so it stands upright and is firmly in place.
Step 5: Prepare the Worm’s Home Your worms need a comfortable bed to settle into. Start by placing a layer of moist cardboard (soak it in water and wring it out) at the very bottom of the tower. Then, add your damp bedding material. Coco coir is excellent—soak a brick in water until it expands into a fluffy, soil-like mass. If using newspaper, shred it and moisten it thoroughly until it has the consistency of a damp sponge. Fill the tower about halfway with bedding.
Step 6: Introduce the Worms! Gently place your red wiggler worms on top of their new bedding. Add a small handful of kitchen scraps (like vegetable peelings) as a “welcome meal.” Leave the lid off for now and let them start to acclimate and burrow down away from the light.
Step 7: Top it Off Once your worms have mostly moved into the bedding, place a lid on top. This can be the cap for a PVC pipe, a plant saucer, a piece of wood, or even a flat rock. The lid is crucial for keeping out light, maintaining moisture, and preventing pests like flies from getting in.
And that’s it! You’ve just installed the beating heart of your urban permaculture loop. Now, let’s learn how to keep it thriving.
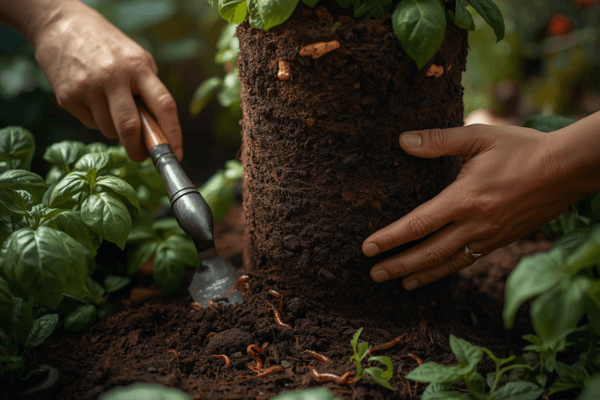
IV. Maintaining Your In-Ground Ecosystem
Congratulations, your worm tower is installed! Now, it’s time to shift from builder to ecosystem manager. The good news is that maintaining this system is remarkably simple. A little routine care is all it takes to keep your wriggly workforce happy and productive.
A. Feeding Your Worms: A Gourmet Menu
Your red wigglers are not picky eaters, but they do have preferences for a healthy and productive life.
- The Favorites (Feed Liberally):
- Fruit and vegetable scraps (peelings, cores, leftovers)
- Coffee grounds and paper filters
- Tea bags (ensure they are plastic-free)
- Crushed eggshells (helps balance pH)
- What to Avoid (The “No-No” List):
- Citrus (oranges, lemons) & Onions/Garlic: In large quantities, these can be too acidic and can harm your worms.
- Meat, Bones, and Dairy: These will rot, create foul odors, and attract pests.
- Oily, Greasy, or Salty Foods: These can disrupt the delicate ecosystem inside the tower.
- Processed Foods: Stick to natural, plant-based scraps for the best results.
Pro Tip: Chop or blend larger scraps into smaller pieces. This gives the worms more surface area to work on, speeding up the composting process dramatically.
B. The Moisture Balance: The “Wrung-Out Sponge” Rule
This is the golden rule of worm care. The bedding inside your tower should always feel like a well-wrung-out sponge.
- If it’s too dry: The worms will become dehydrated and processing will slow down. Add a cup of water to moisten the bedding.
- If it’s too wet: It can become anaerobic (lacking oxygen) and smelly. Add more dry, shredded newspaper or cardboard to soak up the excess moisture. The drainage layer you created at the bottom should handle excess liquid, but preventing sogginess is key.
C. Harvesting the “Liquid Gold”
You may notice a dark liquid collecting at the very bottom of your tower, beneath the gravel layer. This is the leachate, often called “worm tea.” It’s a nutrient-rich byproduct, but it’s important to use it correctly.
- How to Collect: Use a baster or a small cup to carefully extract this liquid from the bottom of the tower or the drainage hole.
- How to Use (Crucial!): This leachate is powerful and can be anaerobic. Always dilute it at a ratio of at least 1 part “worm tea” to 10 parts water. Use this diluted mixture to water your plants for a fantastic nutrient boost.
D. Troubleshooting Common Issues
Even the best-managed systems can have hiccups. Here’s how to solve the most common problems.
- Problem: Fruit Flies.
- Solution: This usually means food is exposed. Always bury new scraps completely under the bedding. You can also place a piece of moist cardboard or a finer mesh screen on top of the bedding as an extra barrier.
- Problem: Foul Odor.
- Solution: A bad smell is a sign of trouble, typically from overfeeding or a lack of oxygen. Stop adding new food for a week or two. Stir the top contents gently with a stick to aerate it, and mix in a generous amount of fresh, dry bedding (shredded cardboard is great) to soak up excess moisture and restore balance.
- Problem: Worms Trying to Leave.
- Solution: Worms are happy to stay in their ideal environment. If they’re trying to escape, conditions inside have become unfavorable.
- Is it too wet or too acidic? Follow the steps for a foul odor (stop feeding, add dry bedding). A handful of crushed eggshells can help neutralize acidity.
- Is there not enough food? Make sure you are feeding them adequate amounts of their favorite scraps.
- Have conditions recently changed? They may just be adjusting. Shine a light over the tower at night for a day or two; since worms hate light, this will encourage them to stay down inside.

V. Closing the Loop: Your Garden’s New Rhythm
With your worm tower actively at work, you’ll soon settle into a new, deeply satisfying rhythm—one that transforms your relationship with your garden, your kitchen waste, and the urban environment itself.
A. The Cycle in Practice
Your old routine of taking out the trash is replaced by a new, purposeful ritual. Each time you prepare a meal, you’ll find yourself setting aside carrot tops, apple cores, and lettuce ends not as garbage, but as a valuable resource. A quick trip to the patio to lift the lid, bury the scraps, and close the loop becomes second nature. In return, your worm tower silently repays this offering. It constantly infuses the soil with life-giving vermicompost and nutrient-rich “tea,” creating a direct, living pipeline of fertility from your kitchen to your plants’ roots. Your plants, in turn, respond to this steady, gourmet diet with vigorous growth, which leads to a more abundant harvest on your table… generating more scraps to fuel the cycle all over again.
B. Observing the Benefits
Within a few weeks, you’ll begin to see tangible proof that the loop is working. Keep an eye out for these clear signs of a thriving ecosystem:
- Deeper Color and Vigor: You’ll notice leaves are a richer, darker green, a classic sign of nitrogen-rich health.
- Explosive Growth: Plants will seem to grow with more energy and resilience, pushing out new stems and leaves with greater speed.
- A Bounty of Blooms and Fruit: Flowering plants will produce more blossoms, and your vegetables—like tomatoes, peppers, and herbs—will set more fruit and appear generally more robust.
- Living Soil: If you dig a small hole near the tower, you’ll feel the difference—the soil will be looser, darker, and crumbly, teeming with life.
C. Beyond the Patio
This small act of integrating a worm tower reaches far beyond the boundaries of your patio. You are actively participating in a quiet revolution against the linear “take-make-waste” model. You are reducing your household’s landfill waste, cutting down on the production and transportation of commercial fertilizers, and sequestering organic waste into healthy soil.
You become more than just a gardener; you become a steward of a miniature ecosystem. This simple system is a powerful demonstration that every one of us, no matter how small our space, can enact profound ecological principles. It empowers you as a sustainable urban citizen, proving that you can create abundance, resilience, and a closed-loop cycle of life, right outside your door.
Conclusion: Your Patio, A Permaculture Paradise
The journey we’ve taken is a powerful one: from seeing our kitchen scraps as waste to recognizing them as the very fuel that can power our gardens. The humble worm tower is the elegant, simple tool that makes this transformation possible, turning potential landfill waste into “black gold” and creating wealth—in the form of vibrant plant life—right in your garden bed.
This project proves a profoundly hopeful idea: you don’t need a farm to practice permaculture. You don’t need vast acres of land to create a resilient, self-sustaining system. By building this urban loop on your balcony, patio, or tiny yard, you have done something extraordinary. You have woven the threads of nature’s wisdom into the fabric of city life, creating a miniature ecosystem that gives back more than it takes.
Look at your patio now. It is no longer just a collection of pots. It is a living, breathing permaculture paradise—a testament to the fact that even the smallest space can be a place of abundance, life, and powerful ecological change.

