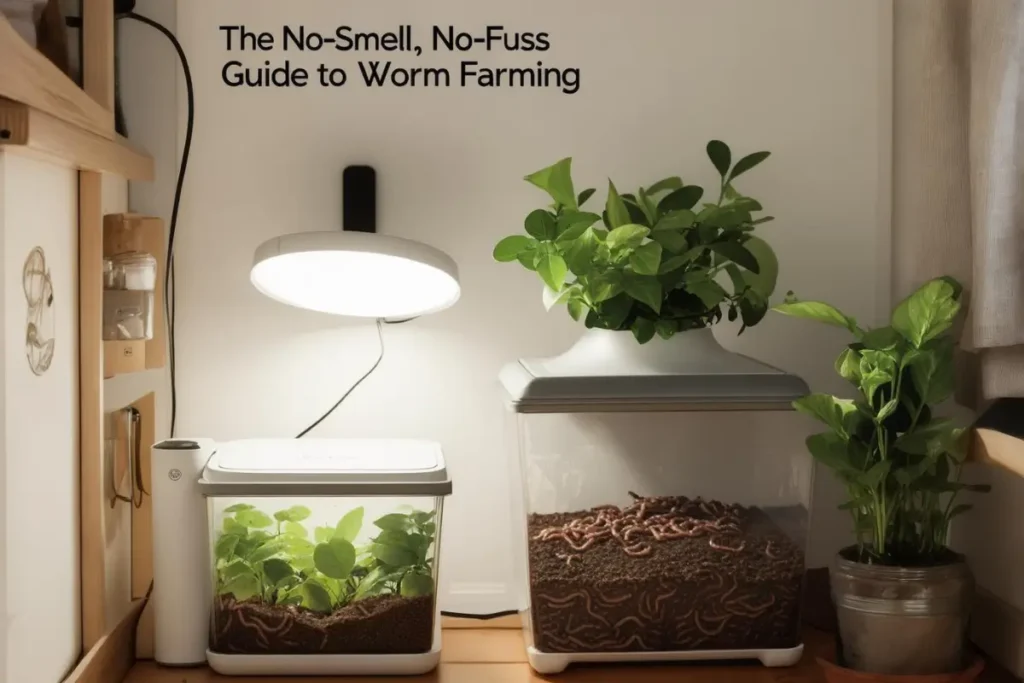
Introduction: From Food Scraps to Black Gold
You carefully separate your recycling, carry your reusable coffee cup, and feel a small pang of guilt every time you scrape those vegetable peels and coffee grounds into the trash. You want to reduce your food waste, to compost, but you live in a studio apartment. The dream of a backyard compost pile is, well, just a dream. So, you resign yourself to the fact that being truly zero-waste is a luxury for people with gardens.
But what if you could transform that very problem into a powerful solution, right on your kitchen counter?
We know what you’re thinking. “Worms? In my apartment? But what about the smell and the mess?” It’s the “ICK” factor, and it’s the number one reason most people never try vermicomposting. The mental image of a stinky, slimy bin spilling over with wriggling escapees is enough to send anyone running for the scented trash bags.
Here’s the secret that seasoned worm wranglers know: a properly maintained worm farm doesn’t smell. In fact, it has a pleasant, earthy aroma, like a forest after rain. Worm farming, or vermicomposting, is not about harboring a mess; it’s about hosting a quiet, efficient, and surprisingly elegant ecosystem that fits seamlessly into your studio life.
This guide is your blueprint to that reality. We will show you exactly how to set up and maintain a thriving, no-smell, no-fuss worm bin that turns your food scraps into “black gold”—the most nutrient-rich fertilizer your houseplants have ever dreamed of. Get ready to become an urban composting hero.

Part 1:
Okay, let’s address the big question first. In a space where every square inch counts, why dedicate precious real estate to a box of worms? The answer is simple: the benefits are so profound, you’ll wonder why you didn’t start sooner. This isn’t just about waste disposal; it’s about unlocking a superpower for your urban lifestyle.
Free, Powerful Fertilizer for Your Urban Jungle Forget expensive, store-bought plant food. The output of your worm bin—a combination of solid castings (vermicompost) and liquid “worm tea”—is pure, liquid gold for plants. This isn’t just fertilizer; it’s a supercharged elixir that boosts plant growth, improves soil health, and naturally suppresses diseases. Your fiddle-leaf fig will flourish, your herb garden will thrive, and you’ll have the satisfaction of creating it all from your own “waste.”
Drastically Reduce Your Environmental Footprint The average person generates hundreds of pounds of food waste annually, most of which ends up in landfills where it decomposes without oxygen, releasing methane—a potent greenhouse gas. By composting right in your kitchen, you’re directly intercepting that waste stream. You’ll be amazed at how quickly your regular trash bin fills up more slowly and smells less. It’s a tangible, feel-good action that turns a problem into a solution, right where it’s created.
The “Pet” You Can Actually Handle (Because They Preear to Be Left Alone) Think of them as the perfect low-maintenance pet for the busy urbanite. Your worm workforce is quiet, doesn’t need walks, and won’t claw your furniture. They are happily self-sufficient for days at a time, making them ideal for your work-trip schedule or busy social life. Plus, there’s a strangely meditative joy in peeking in to see them quietly turning your apple core into black gold. It’s a living, working science project on your counter.
Become the Ultimate Sustainability Hero Let’s be real: having a thriving worm farm in your studio apartment is an undeniable badge of cool, eco-conscious credibility. When a friend admires your thriving plants, you get to casually mention, “Oh, thanks! I make the fertilizer myself… with my worm bin.” You’ll instantly become the go-to source for green living advice in your friend group, inspiring others to see the potential in their own small spaces.
Convinced there’s more to it than just “ick”? Let’s dive into the simple principles that keep this system odor-free and fuss-free.

**Part 2:
Before we talk about bins and bedding, let’s get one thing straight: a smelly worm bin is a symptom, not a given. It’s a sign that the ecosystem is out of balance. The entire goal of a successful studio apartment worm farm is to create the perfect environment for your worms to do their job aerobically (with oxygen).
Think of these three principles as the holy trinity of hassle-free vermicomposting. Master these, and you are 90% of the way to success.
Principle 1: Balance is Everything (The Carbon-to-Nitrogen Mix) Imagine your kitchen scraps—fruit peels, veggie ends, coffee grounds—as the “Green” component (Nitrogen). They’re wet, they’re dense, and on their own, they’ll rot into a slimy, smelly mess. Now, imagine shredded paper, cardboard, or dry leaves as the “Brown” component (Carbon). They are dry, fluffy, and absorbent.
The secret to no smell is to always bury your “Greens” under a generous layer of “Browns.” The Browns act as a bulking agent, soaking up excess moisture and allowing air to flow through the bin, which prevents the anaerobic bacteria (the stinky kind) from taking over. It’s not rocket science; it’s just a balanced diet for your wriggly workforce.
Principle 2: Don’t Drown Your Worms (The Wrung-Out Sponge Rule) Worms breathe through their skin, and for that to work, their environment needs to be moist—but not wet. The perfect moisture level is the single most important tactile skill you’ll develop.
Your bin should feel like a wrung-out sponge. If you squeeze a handful of bedding and water streams out, it’s too wet (a one-way ticket to Smellville). If it’s bone-dry and fluffy, it’s too dry, and your worms will suffer. This is easy to manage by misting with water if it’s dry or adding more dry, shredded newspaper if it’s too wet.
Principle 3: Let Them Breathe (The Power of Oxygen) Oxygen is your best friend and the enemy of bad odors. Foul smells are caused by anaerobic decomposition—what happens when organic matter breaks down without air (think of a swamp).
By ensuring your bin has adequate ventilation (through air holes) and a fluffy, carbon-rich bedding, you are promoting aerobic decomposition. This is the clean, earthy-smelling process we’re after. Simply put, if you let air in, the smells can’t stay.
Get these three principles right, and you’ve built a foundation for a truly no-smell, no-fuss system. Ready to get your hands dirty? Let’s gather your supplies.
 (1)")
**Part 3:
The great news? You don’t need a lot of fancy or expensive equipment to get started. In fact, you can create a perfectly functional worm farm with items you might already have or can find easily and cheaply. Here’s your straightforward shopping list.
The Bin: Your Worm’s Studio Apartment This is their home, and you have two fantastic options, depending on your style.
- Option A: The Simple Stackable Tote System (DIY & Budget-Friendly) This is the classic, cost-effective method. All you need are two same-sized plastic storage totes (8-10 gallons is perfect). One bin will be the active living space, and the other will act as a lid and a catchment system for any excess liquid (the valuable “worm tea”). You’ll drill ventilation holes in the sides of the top bin and drainage holes in the bottom. It’s cheap, effective, and you can find countless tutorials online.
- Option B: The Store-Bought Worm Factory (Aesthetic & Efficient) If you prefer a sleek, purpose-built system that’s designed for ease of use and harvesting, a commercial worm bin is a great investment. Brands like Worm Factory® or Urbalive® are designed with stacked trays, making harvest a breeze as the worms migrate upwards. They are space-efficient and often more aesthetically pleasing, designed to look right at home on a balcony or in a kitchen.
The Worms: Your Tiny, Tireless Workforce Not all worms are created equal! You can’t just dig up earthworms from your local park.
- The Star Species: Red Wigglers (Eisenia fetida) These are the undisputed champion composters. They are surface dwellers with a voracious appetite, thrive in the conditions of a bin, and reproduce quickly. They are the perfect worm for the job.
- Where to Find Them: Look for them at local garden centers, order them online from reputable worm farms, or check local gardening or sustainability groups on Facebook—many worm wranglers are happy to sell you a starter batch.
- How Many to Start: For a typical household of 1-2 people, start with about half a pound to one pound of worms (roughly 500-1,000 worms). It’s better to start a little small and let them multiply to match your food scrap output.
The Bedding: The Worm’s Bed & Living Room This is the carbon-rich “brown” material that fills their bin, providing a habitat, absorbing moisture, and helping prevent smells.
- Shredded Newspaper/Cardboard: This is the #1 cheapest, easiest, and best option. Avoid glossy ads. Simply shred it by hand or with a paper shredder into 1-inch strips. It’s the perfect bedding.
- Coir (Coconut Fiber): A great, low-mess alternative often sold in compressed bricks. You soak it in water to fluff it up. It holds moisture beautifully and is pH neutral.
The Extras: Your Helper Tools
- A Small Trowel or Garden Scoop: For gently burying food scraps and fluffing the bedding.
- A Spray Bottle: Filled with water for lightly misting the bedding to maintain that perfect “wrung-out sponge” moisture level.
And that’s it! With these simple items, you have everything you need to build a thriving mini-ecosystem. Now, let’s put it all together.
")
**Part 4:
The moment has arrived! Setting up your worm bin is a simple, one-time task that takes less than 30 minutes. Follow these five easy steps, and you’ll have a happy home for your new composting companions.
Step 1: Prepare the Bin (A Little Breathing Room)
- If you’re using the DIY Tote System: Take your drill and create ventilation holes. Drill several small (1/4-inch) holes around the upper sides of one tote for air flow. Then, drill a series of slightly larger holes in the bottom of this same tote for drainage. This “active” bin will sit inside the second, solid bin, which will catch any excess liquid.
- If you have a store-bought bin: Simply assemble it according to the manufacturer’s instructions. They are designed with built-in ventilation, so this step is a breeze!
Step 2: Fluff the Bedding (Make it Cozy) Take your shredded newspaper or cardboard and place it in a large bowl. Slowly add water and mix it with your hands until all the bedding is thoroughly dampened. The goal is for it to feel like a wrung-out sponge—damp to the touch, but not dripping water. Fluff this moist bedding into your bin, filling it about halfway. This is your worms’ new bedroom and living room!
Step 3: Introduce the Worms (Housewarming Party) Gently empty your worms on top of the fluffy bedding. Don’t bury them! They might seem a little startled at first and will quickly start burrowing down to get away from the light. At this stage, just leave them alone. Put the lid on (with air holes uncovered) and let them acclimate to their new digs for about 24 hours before you feed them.
Step 4: The First Meal (A Welcome Snack) After the worms have settled in, it’s time for their first meal. Dig a small hole in a corner of the bedding, and bury a handful of soft, worm-friendly scraps—think apple cores, banana peels, or lettuce. Cover the food completely with the damp bedding. This is the golden rule! Burying the food prevents fruit flies and, you guessed it, smells.
Step 5: Find the Perfect Spot (Location, Location, Location) Worms prefer a stable, comfortable environment. Place your bin in a dark, temperature-stable spot (between 55°F and 75°F / 13°C and 24°C is ideal). Perfect locations include under the kitchen sink, inside a ventilated closet or cabinet, on a shaded balcony, or in a quiet corner. Avoid direct sunlight, radiators, or drafty windows.
And that’s it! You’re officially a worm farmer. Now, let’s talk about how to keep them happy and well-fed for the long haul.
")
**Part 5:
Feeding your worms is where the “no-smell” magic truly happens. It’s not just about what you feed them, but how you balance it. Remember Principle #1: Balance is Everything. Every time you add food (“Greens”), you must also add bedding (“Browns”). This simple act is your single most powerful tool against odor and pests.
Worm Favorites (The “Green” Nitrogen) Your worms are fantastic vegan foodies. They love most fruit and vegetable scraps, which provide the nitrogen they need to thrive.
- Great choices include: Apple cores, banana peels, melon rinds, lettuce, carrot peels, cucumber ends, cooked vegetable leftovers (unsalted), avocado skins, and stale bread.
- Special Mentions:
- Coffee Grounds & Tea Bags (loose-leaf is best): A worm bin superstar! They’re a great green and worms love them.
- Crushed Eggshells: Not a food, but essential. They provide grit for the worms’ digestion and help neutralize acidity in the bin. Rinse, dry, and crush them finely.
The “Brown” Carbon (The Key to No Smell) This is the unsung hero of your odor-free operation. Browns are the carbon-rich, dry, and fluffy materials that soak up moisture, create air pockets, and prevent the food from becoming a slimy, anaerobic mess.
- Always have a stash of: Shredded newspaper (non-glossy), torn-up cardboard (avoid glossy coatings), paper egg cartons, or dry fallen leaves.
- The Golden Rule: With every handful of food scraps you add, add at least one handful of these “browns” on top of the buried food. This is non-negotiable for a smell-free bin.
The “Do Not Feed” List (The Trouble-Makers) Some items will disrupt your bin’s delicate ecosystem, leading to bad smells, pests, and unhappy worms. When in doubt, leave it out!
- Meat, Bones, & Fish: Will rot and create foul odors, attracting pests.
- Dairy Products (cheese, milk, yogurt): Similarly, they putrefy and smell terrible.
- Oily, Greasy, or Buttery Foods: Coat the worms’ skin (which they breathe through) and disrupt the bin’s environment.
- Onions & Garlic: In large quantities, they can be too pungent and acidic, potentially harming the worms.
- Citrus Peels (oranges, lemons): Highly acidic and contain natural chemicals that can be harmful in excess. A small piece now and then is okay, but avoid large amounts.
- Spicy Peppers: Can irritate your worm colony.
Stick to this menu, and your worms will reward you with rapid, odor-free composting. Now, let’s talk about the minimal upkeep required to keep everything running smoothly.
**Part 6: Maintenance & Troubleshooting: Your 5-Minute Weekly Routine
One of the best things about worm farming is how little hands-on time it requires. This isn’t a daily chore; it’s a quick weekly check-in. Think of it as less like taking out the trash and more like tending to a very low-maintenance houseplant.
Your 5-Minute Weekly Check-In
Set a reminder for once a week. When it goes off, here’s your simple routine:
- Feed Them (The Rotation Method): Your worms will likely need feeding about 1-2 times per week. Dig a small hole in a different section of the bin from your last feeding, bury the new food scraps, and cover them completely with the existing bedding and a fresh handful of “browns” (shredded paper). Next week, pick a new spot. This rotation gives the worms time to process one area before you add more and prevents any one spot from getting overloaded.
- Check the Moisture (The Wrung-Out Sponge Test): Stick a hand in the bedding and feel it. Does it feel dry? Give it a light mist from your spray bottle. Does it feel soggy or water pools at the bottom? Gently mix in a generous amount of fresh, dry shredded newspaper to soak up the excess moisture. This quick check is your best defense against most problems.
- Observe: Take a quick peek. Are the worms active and wriggling? Is the food from last week disappearing? This visual check tells you everything is running smoothly.
Troubleshooting Common Issues
Even with the best care, tiny issues can pop up. Don’t panic! They are almost always easy to fix.
- Problem: It smells!
- Solution: A healthy bin smells earthy. A foul smell means the ecosystem is out of balance. You are likely overfeeding or the bin is too wet. Stop adding new food for a week. Stir the contents gently to add air, and mix in a lot of dry, shredded newspaper to re-balance the moisture and carbon levels.
- Problem: Fruit flies!
- Solution: These tiny flies are attracted to exposed food. Always bury your scraps deeply under at least 2 inches of bedding. If they’ve already found your bin, create a simple fruit fly trap: a small cup of apple cider vinegar with a drop of dish soap, covered with plastic wrap with a few holes poked in it, placed near the bin.
- Problem: Worms are trying to escape!
- Solution: Worms are homebodies; if they’re trying to leave, conditions inside are uncomfortable. The most common culprits are:
- Too Wet/Dry: Check your moisture level and adjust.
- Too Acidic: Add a handful of crushed eggshells to neutralize the pH.
- Not Enough Food: They might be hungry! Try a small, well-buried feeding.
- New Environment: It’s normal to see a few explorers in the first 48 hours. If it continues, check the conditions above.
With this simple routine and troubleshooting guide, you’re equipped to handle almost anything your bin throws at you. Now, for the best part: reaping the rewards
 (1)")
**Part 6: Maintenance & Troubleshooting: Your 5-Minute Weekly Routine
One of the best things about worm farming is how little hands-on time it requires. This isn’t a daily chore; it’s a quick weekly check-in. Think of it as less like taking out the trash and more like tending to a very low-maintenance houseplant.
Your 5-Minute Weekly Check-In
Set a reminder for once a week. When it goes off, here’s your simple routine:
- Feed Them (The Rotation Method): Your worms will likely need feeding about 1-2 times per week. Dig a small hole in a different section of the bin from your last feeding, bury the new food scraps, and cover them completely with the existing bedding and a fresh handful of “browns” (shredded paper). Next week, pick a new spot. This rotation gives the worms time to process one area before you add more and prevents any one spot from getting overloaded.
- Check the Moisture (The Wrung-Out Sponge Test): Stick a hand in the bedding and feel it. Does it feel dry? Give it a light mist from your spray bottle. Does it feel soggy or water pools at the bottom? Gently mix in a generous amount of fresh, dry shredded newspaper to soak up the excess moisture. This quick check is your best defense against most problems.
- Observe: Take a quick peek. Are the worms active and wriggling? Is the food from last week disappearing? This visual check tells you everything is running smoothly.
Troubleshooting Common Issues
Even with the best care, tiny issues can pop up. Don’t panic! They are almost always easy to fix.
- Problem: It smells!
- Solution: A healthy bin smells earthy. A foul smell means the ecosystem is out of balance. You are likely overfeeding or the bin is too wet. Stop adding new food for a week. Stir the contents gently to add air, and mix in a lot of dry, shredded newspaper to re-balance the moisture and carbon levels.
- Problem: Fruit flies!
- Solution: These tiny flies are attracted to exposed food. Always bury your scraps deeply under at least 2 inches of bedding. If they’ve already found your bin, create a simple fruit fly trap: a small cup of apple cider vinegar with a drop of dish soap, covered with plastic wrap with a few holes poked in it, placed near the bin.
- Problem: Worms are trying to escape!
- Solution: Worms are homebodies; if they’re trying to leave, conditions inside are uncomfortable. The most common culprits are:
- Too Wet/Dry: Check your moisture level and adjust.
- Too Acidic: Add a handful of crushed eggshells to neutralize the pH.
- Not Enough Food: They might be hungry! Try a small, well-buried feeding.
- New Environment: It’s normal to see a few explorers in the first 48 hours. If it continues, check the conditions above.
With this simple routine and troubleshooting guide, you’re equipped to handle almost anything your bin throws at you. Now, for the best part: reaping the rewards
**Part 7: Harvesting the Rewards (The Payoff!)
This is the moment you’ve been working towards—the grand finale where your food scraps are transformed into the most powerful plant food on earth. Harvesting might sound intimidating, but with the right method, it’s a clean and fascinating process.
When Is It Ready?
After 3 to 6 months of feeding, you’ll notice a beautiful transformation. The original bedding of shredded paper will be almost unrecognizable, having been broken down into a dark, crumbly, soil-like material that smells fresh and earthy. This is your vermicompost, often called “black gold.” It’s teeming with beneficial microbes and nutrients, and it’s ready to give your plants a super-charge.
The Simple Harvest Method: The “Push-to-One-Side” Technique
Forget complicated sifting or messy dumping. This method is lazy, genius, and perfectly suited for a small-space bin.
- Stop feeding the entire bin for a week or two to let the worms process what’s left.
- Push all of the finished compost and bedding to one side of the bin.
- Add fresh, moist bedding and a generous helping of food scraps only to the newly emptied side.
- Wait. Over the next 1-2 weeks, the hungry worms will naturally migrate across the bin to the new food and bedding. They leave their finished castings behind.
- Harvest. Once most of the worms have moved over, you can simply scoop out the beautiful, worm-free vermicompost from the vacated side. It’s that easy!
How to Use Your Black Gold
You’ve created two types of powerful fertilizer:
- Worm Tea (Liquid Fertilizer): This is the nutrient-rich liquid that may drain from your bin. Dilute it with water until it looks like weak tea (a 10:1 ratio is a good start) and use it to water your plants. They will absorb the nutrients instantly for a quick boost.
- Vermicompost (Solid Gold):
- Mix-In: Blend a handful into the potting soil when repotting your houseplants or starting new seeds.
- Top Dressing: Gently scratch a tablespoon or two into the top inch of soil around the base of your plants every few months. Every time you water, nutrients will trickle down to the roots.
This “black gold” is the ultimate reward for your patience and care, closing the loop right in your own home and turning your waste into life-giving nourishment for your own urban jungle.
Mm
Of course! Here is the text for the blog conclusion, “You’re Now an Urban Worm Warrior,” designed to be inspiring and provide a clear next step for the reader.
Conclusion: You’re Now an Urban Worm Warrior
Let’s take a step back and look at what you’ve learned. You now know that worm farming isn’t a mysterious or messy endeavor. With a simple bin, the right workforce of Red Wigglers, and the golden rule of balancing “greens” and “browns,” you have everything you need to run a clean, compact, and incredibly rewarding ecosystem right in your studio.
The idea of a stinky bin has been debunked, replaced by the simple, earthy reality of a thriving mini-farm. You’re equipped not just with the “how-to,” but with the “why”—transforming waste into wealth for your plants and making a tangible dent in your environmental footprint.
So, take the plunge! Order those worms, grab a storage tote, and start shredding that newspaper. You’ll be amazed at how this small, quiet system on your countertop can foster a profound connection to a larger cycle of sustainability, all from within your own four walls.
You are no longer just a renter or a city-dweller; you are an innovator, a composter, an Urban Worm Warrior.
Got questions before you get started? Leave a comment below! And if you know a fellow apartment-dweller who could use this no-smell, no-fuss guide, please share it!