Urban permaculture is revolutionizing how city dwellers grow food, blending sustainability with innovative gardening techniques. As more people embrace small-scale farming in apartments, balconies, and rooftops, one key challenge remains: ensuring plants get enough light without wasting energy.
Traditional lighting solutions often consume excessive electricity, contradicting permaculture’s core principles of sustainability and earth care. This is where energy-efficient lighting comes in—offering urban gardeners a way to nurture their plants while minimizing environmental impact and cutting energy costs.
From LED grow lights to solar-powered solutions, modern lighting technology can extend growing seasons, boost yields, and even support year-round harvests. Whether you’re cultivating herbs on a windowsill or running an indoor vertical farm, choosing the right lighting can make all the difference.
In this article, we’ll explore the best energy-efficient lighting options for urban permaculture, helping you create a thriving, eco-friendly garden—no matter how small your space. Let’s shine a light on sustainable growing!
Why This Matters
- Urban permaculture reduces food miles and increases self-sufficiency.
- Energy-efficient lighting lowers costs and carbon footprint.
- Smart lighting choices can improve plant health and productivity.
Why Energy-Efficient Lighting Matters in Urban Permaculture
Urban permaculture isn’t just about growing food—it’s about creating sustainable, closed-loop systems that work in harmony with nature. When it comes to indoor and urban gardening, lighting plays a crucial role, but traditional options can be energy hogs, undermining the very principles of permaculture. Here’s why switching to energy-efficient lighting is a game-changer for eco-conscious growers.
1. Reducing Carbon Footprint While Growing Food Indoors
Conventional grow lights, like high-pressure sodium (HPS) or incandescent bulbs, guzzle electricity—often sourced from fossil fuels. By opting for LEDs, solar-powered lights, or smart lighting systems, urban gardeners can drastically cut their energy consumption. This shift not only shrinks your personal carbon footprint but also contributes to broader climate change mitigation—a core tenet of permaculture’s Earth Care ethic.
2. Lowering Electricity Costs for Urban Gardeners
Let’s face it: energy bills add up, especially when running grow lights for hours each day. Energy-efficient alternatives like LED grow lights use up to 75% less power than traditional options while delivering the same (or better) light intensity. Over time, this translates to significant savings, making urban permaculture more accessible and financially sustainable—aligning perfectly with the People Care principle.
3. Extending Growing Seasons with Artificial Lighting
One of the biggest challenges for urban growers is limited sunlight, whether due to short winter days or shaded balconies. Energy-efficient lighting allows you to:
- Start seeds earlier in the season
- Grow heat-sensitive crops (like lettuce) during summer by moving them indoors
- Cultivate year-round harvests without relying on seasonal sunlight
This flexibility ensures a consistent food supply, reducing dependence on store-bought produce—another win for sustainability.
4. Aligning with Permaculture Ethics (Earth Care, People Care, Fair Share)
Permaculture revolves around three core ethics, and energy-efficient lighting supports them all:
- Earth Care – Minimizing energy waste protects natural resources.
- People Care – Affordable lighting solutions make urban gardening viable for more people.
- Fair Share – Using renewables (like solar-powered lights) ensures energy equity and reduces strain on the grid.
The Bottom Line
Switching to energy-efficient lighting isn’t just a small upgrade—it’s a powerful step toward truly sustainable urban permaculture. By choosing the right systems, you can grow more food, save money, and reduce environmental impact—all while staying true to permaculture’s foundational principles.
Next up: We’ll dive into the best types of energy-efficient lighting for your urban garden!

Types of Energy-Efficient Lighting for Urban Gardens
Choosing the right lighting system is crucial for successful urban permaculture. Each technology offers unique benefits tailored to different growing needs and spaces. Let’s explore the best options available today.
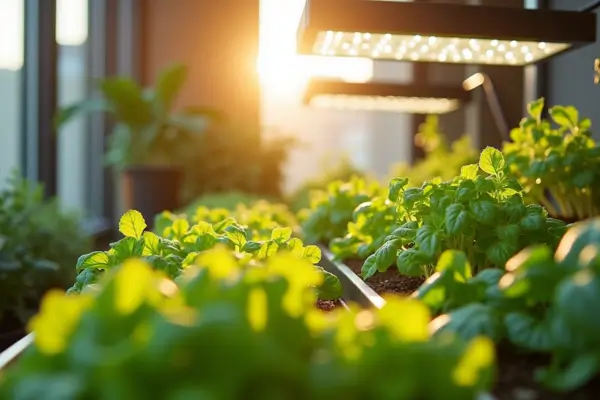
A. LED Grow Lights: The Gold Standard
Why They Shine:
- Energy sippers: Use 40-75% less energy than traditional lighting
- Built to last: 50,000+ hour lifespan (5+ years of continuous use)
- Precision spectrum tuning: Full-spectrum models mimic sunlight, while customizable options let you optimize wavelengths for different growth stages
Ideal Applications:
- Seed starting: Promote strong seedling development
- Leafy greens: Perfect for kale, lettuce, and microgreens
- Fruiting plants: Specialized red-spectrum models boost tomato and pepper yields
Top Picks:
- Spider Farmer SF-1000 (best balance of power and efficiency)
- Mars Hydro TS 600 (budget-friendly full-spectrum option)
- VIPARSPECTRA XS1500 (professional-grade dimmable control)
B. Compact Fluorescent Lights (CFLs): The Budget Starter
Key Advantages:
- Wallet-friendly: Lowest upfront cost of all grow lights
- Plug-and-play: Works in standard light fixtures
- Gentle energy use: More efficient than incandescents
Best Uses:
- Windowsill herb gardens (basil, mint, parsley)
- Low-light houseplants (pothos, snake plants)
- Supplemental lighting for darker corners
Pro Tip: Use 6500K bulbs for vegetative growth and 2700K for flowering stages.
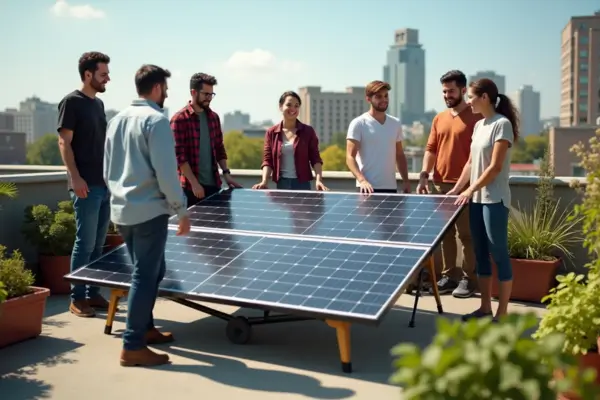
C. Solar-Powered Lighting: Off-Grid Freedom
Sustainable Benefits:
- Zero electricity bills: Harnesses free solar energy
- Complete mobility: No wiring needed
- Weather-resistant options for outdoor use
Perfect For:
- Balcony container gardens
- Vertical growing systems
- Nighttime supplemental lighting
Implementation Ideas:
- Solar path lights around garden borders
- Hanging solar lanterns above planters
- DIY solar panel setups with battery storage
D. Smart Lighting Systems: The Tech Revolution
Cutting-Edge Features:
- Sunrise/sunset simulations for gradual light transitions
- App-controlled spectrums (adjust blue/red ratios remotely)
- Energy monitoring to track usage and costs
- Weather adaptation (automatically adjusts on cloudy days)
Ideal Users:
- Data-driven gardeners who love precision
- Frequent travelers needing remote control
- Tech enthusiasts integrating with home automation
Leading Systems:
- Philips Hue Grow Light (seamless smart home integration)
- Aerogarden Harvest Elite (all-in-one smart garden)
- LumiGrow Pro (commercial-grade controls)
Making Your Choice
Consider these factors when selecting:
- Space size (LEDs for larger areas, CFLs for small spots)
- Plant requirements (fruiting vs. leafy greens)
- Budget (upfront vs. long-term savings)
- Tech comfort level (simple vs. automated systems)
Next Steps: In the following section, we’ll help you match these lighting options to your specific urban growing setup for optimal results.

How to Choose the Right Lighting for Your Urban Permaculture Setup
Selecting the perfect lighting system for your urban garden requires careful consideration of several key factors. Let’s break down the decision-making process to help you create an optimally lit, energy-efficient growing space.
1. Assessing Your Growing Space
Indoor vs. Outdoor Needs
- Indoor gardens: Require full-spectrum lighting that mimics sunlight
- Outdoor/balcony gardens: May only need supplemental lighting for cloudy days or shade areas
Measuring Your Space
- Calculate your growing area (length × width)
- Note ceiling height (affects light hanging distance)
- Map natural light sources (windows, skylights)
Quick Reference:
- Small spaces (1-2 sq ft): 1-2 CFL bulbs or small LED panel
- Medium (3-10 sq ft): 100-300W LED or multiple CFLs
- Large (10+ sq ft): Multiple LED panels or smart lighting system
2. Matching Light Spectrum to Plant Needs
Understanding Light Spectrums
- Blue light (400-500nm): Promotes vegetative growth (leaves, stems)
- Red light (600-700nm): Enhances flowering and fruiting
- Full spectrum: Ideal for all growth stages
Plant-Specific Recommendations:
- Leafy greens: 6500K (blue-heavy)
- Herbs: Full-spectrum or 5000K
- Fruiting plants: Switch to 2700K (red-heavy) during flowering
Pro Tip: Many modern LEDs allow spectrum adjustment through different growth phases.
3. Calculating Energy Consumption & Cost-Effectiveness
Energy Math Made Simple
- Check light’s wattage (e.g., 100W LED)
- Estimate daily usage (e.g., 14 hours)
- Calculate: Watts × Hours ÷ 1000 = kWh/day
- Example: 100W × 14h ÷ 1000 = 1.4 kWh/day
- Multiply by your electricity rate (check utility bill)
Cost Comparison Example (30 Days):
| Light Type | Wattage | Monthly Cost* |
| LED | 100W | $5.04 |
| CFL | 150W | $7.56 |
| HPS | 400W | $20.16 |
*Based on $0.12/kWh, 14h/day
4. Balancing Upfront Costs vs. Long-Term Savings
Cost Breakdown by Technology
| Light Type | Initial Cost | Lifespan | Energy Savings |
| LED | $$$ | 50,000+ hrs | 75%+ |
| CFL | $ | 10,000 hrs | 30% |
| Solar | $$-$$$ | Varies | 100% |
Smart Investment Strategy:
- Budget-conscious: Start with CFLs, upgrade later
- Serious growers: Invest in quality LEDs
- Off-grid enthusiasts: Solar systems pay off long-term
Return on Investment Example:
A $150 LED panel replacing a 400W HPS:
- Saves ~$15/month in electricity
- Pays for itself in 10 months
- Lasts 5+ years with continued savings
Implementation Checklist
✓ Measure your growing area
✓ Determine primary plant types
✓ Calculate your energy budget
✓ Consider future expansion
✓ Compare 3-year total cost of ownership
Next Steps: Once you’ve selected your lighting, we’ll show you how to maximize its efficiency and avoid common pitfalls in our upcoming sections.
DIY Energy-Efficient Lighting Solutions for Urban Permaculture
For urban permaculture enthusiasts who love hands-on projects, creating your own lighting solutions can be both rewarding and budget-friendly. These DIY approaches combine sustainability with innovation, helping you grow more while spending less.
1. Upcycling Household LEDs into Grow Lights
Materials Needed:
- Old LED bulbs (daylight spectrum, 5000K+)
- Lamp sockets or extension cords
- Aluminum foil or reflective backing
- Basic tools (wire cutters, screwdriver)
Step-by-Step Guide:
- Remove the plastic domes from LED bulbs to expose the diodes
- Create a reflective backing using aluminum foil or baking sheets
- Arrange multiple bulbs in a cluster above plants (4-6 bulbs per sq ft)
- Position 6-12 inches above seedlings or leafy greens
Cost Comparison:
- Commercial LED grow light: $50-$200
- DIY version: $0-$20 (using existing bulbs)
Pro Tip: Use a mix of 6500K (cool white) and 3000K (warm white) bulbs to approximate full-spectrum light.
2. Building a Simple Solar-Powered Lighting Setup
Components Required:
- 20W solar panel ($25-$50)
- 12V battery ($20-$40)
- LED strip lights (waterproof for outdoor use)
- Charge controller ($15)
- Basic wiring supplies
Assembly Instructions:
- Connect solar panel to charge controller
- Wire controller to battery
- Attach LED strips to battery (with switch if desired)
- Mount panel in full sun, position lights over plants
System Capacity:
- Powers 10-15W of LEDs for 4-6 hours daily
- Ideal for balcony herb gardens or supplemental lighting
3. Light Optimization with Reflective Materials
Effective Options:
- Mylar emergency blankets (90% reflectivity, $2 each)
- White latex paint (85% reflectivity)
- Aluminum foil (matte side preferred to avoid hot spots)
- Corrugated plastic sheets (weatherproof alternative)
Installation Tips:
- Line walls and surfaces surrounding plants
- Create reflective “caves” for seedlings
- Angle reflectors to bounce light upward from below leaves
- Replace/clean materials every 6 months
Light Boost Results:
Can increase effective light levels by 30-50% without additional energy use
4. Ultra-Low-Cost Lighting Alternatives
Creative Solutions for Tight Budgets:
- Desk lamp conversion: Use clamp lights with CFL bulbs
- Christmas LED strings: Wrap around vertical gardens
- Jar lanterns: Solar path lights inside glass jars (diffused light for herbs)
- Battery-powered LEDs: Motion-activated lights for small spaces
Budget Breakdown:
| Solution | Cost | Best For |
| CFL clamp light | $10 | Small herb gardens |
| Solar jar lights | $15 | Decorative edible displays |
| LED string lights | $20 | Vertical growing systems |
Safety Considerations
- Always waterproof outdoor electrical connections
- Avoid overheating with proper ventilation
- Don’t exceed rated wattage for fixtures
- Use GFCI protection for wet locations
Maintenance Tips:
- Clean reflectors monthly
- Check solar connections seasonally
- Rotate plants under fixed light sources
- Monitor for heat stress on leaves
These DIY solutions prove that effective grow lighting doesn’t require expensive equipment. With some creativity and basic materials, you can build a customized system that meets your plants’ needs while staying true to permaculture principles of sustainability and resourcefulness.
Ready to take it further? In our next section, we’ll cover common lighting mistakes to avoid so your DIY system performs at its best.
")
Common Mistakes to Avoid with Energy-Efficient Lighting
Even with the best intentions, urban permaculturists often make lighting errors that can stunt plant growth or waste energy. Let’s explore these pitfalls and how to avoid them for optimal garden performance.
1. Over-Lighting or Under-Lighting Plants
The Goldilocks Principle of Plant Lighting:
- Symptoms of too much light: Bleached leaves, crispy edges, stunted growth
- Symptoms of too little light: Leggy stems, small leaves, slow growth
- Daily light integral (DLI) targets:
- Leafy greens: 12-17 mol/m²/day
- Fruiting plants: 20-30 mol/m²/day
Smart Solutions:
- Use a lux meter app (free options available) to measure intensity
- Follow manufacturer’s hanging height recommendations
- Implement timers for consistent photoperiods (14-16 hrs for most edibles)
2. Ignoring Heat Management
The Hidden Challenge of “Cool” Lights:
- LEDs: While efficient, clustered panels still generate heat
- CFLs: Base temperatures can reach 150°F (66°C)
- Consequences: Reduced lamp life, stressed plants, fire risk
Effective Cooling Strategies:
- Airflow solutions:
- Computer fans for enclosed spaces
- Oscillating fan at low setting
- Spacing guidelines:
- Maintain 6-12″ clearance above canopy
- Allow 2-3″ between multiple fixtures
- Heat monitoring:
- Infrared thermometer ($20) to check leaf temps
- Ideal range: 72-78°F (22-26°C)
3. Choosing the Wrong Light Spectrum
Growth Stage Lighting Requirements:
| Stage | Ideal Spectrum | Common Mistakes |
| Seedlings | Blue-heavy (6500K) | Using warm lights causes stretching |
| Vegetative | Full-spectrum | Red-only leads to weak stems |
| Flowering | Red-heavy (2700K) | Insufficient red delays fruiting |
Pro Adjustment Tips:
- Dual-spectrum LEDs: Allow manual adjustments
- Layered lighting: Combine different fixture types
- Seasonal changes: Mimic natural light shifts
4. Forgetting to Adjust Lighting as Plants Grow
The Dynamic Lighting Challenge:
- Height changes: 2″ seedlings vs. 24″ mature plants
- Canopy density: Lower leaves get shaded over time
- Seasonal variations: Winter vs. summer light needs
Maintenance Schedule:
- Weekly:
- Measure plant height
- Check lower leaf color
- Monthly:
- Adjust fixture height
- Rotate plants
- Seasonally:
- Change photoperiod
- Swap spectrum emphasis
Adaptive Lighting Techniques:
- Trellis systems: Keep plants at consistent heights
- Tiered lighting: Multiple levels for different growth stages
- Smart controllers: Automatically adjust intensity/duration
Bonus Mistake: Neglecting Energy Monitoring
Hidden Costs to Watch:
- Vampire drain: Lights drawing power when off
- Peak hour usage: Running lights during high-rate periods
- Inefficient reflectors: Wasted light = wasted energy
Simple Energy Audits:
- Plug lights into a kill-a-watt meter ($25)
- Track weekly consumption
- Compare to plant growth results
By avoiding these common errors, you’ll create a lighting system that truly supports your urban permaculture goals—maximizing plant health while minimizing energy waste. Remember: the best lighting setups evolve alongside your garden’s needs.
Coming Next: Practical tips for troubleshooting your lighting system when problems arise.
Smart Strategies for Maximizing Lighting Efficiency
Getting the most from your energy-efficient lighting requires more than just choosing the right fixtures. These professional techniques will help you optimize every watt of power while boosting plant productivity in your urban permaculture system.
1. Automated Lighting Control Systems
Beyond Basic Timers:
- Smart plugs with scheduling: Program different durations for summer/winter
- Dawn/dusk simulation: Gradual 30-minute ramp-up/down reduces plant stress
- Motion-activated lighting: Ideal for frequently accessed growing areas
Advanced Sensor Options:
- PAR sensors: Measure photosynthetically active radiation ($$$ but precise)
- Lux meters with data logging: Track light accumulation over time
- Soil moisture-linked controls: Lights only activate when plants need water
Energy Savings Potential: Proper automation can reduce lighting costs by 20-40%
2. Advanced Light Reflection Techniques
Professional-Grade Solutions:
- Mylar with diamond pattern: 95% reflectivity without hot spots
- 3D reflective walls: Angled panels create light tunnels
- Rotating mirror systems: (For advanced setups) moves reflected sunlight
DIY Reflection Boosters:
- Line shelves with aluminum flashing (home improvement stores)
- Create light tubes from soda cans for focused reflection
- Use emergency blankets as removable curtain liners
Effectiveness Test: Place a white sheet of paper under leaves – you should see faint shadows from reflected light if system is working
3. Hybrid Lighting Systems
Natural + Artificial Light Integration:
- Light tube combos: Solar tubes supplemented with LED rings
- Window light amplifiers: Prismatic films that diffuse and redirect sunlight
- Tracking grow lights: Adjust position automatically as sun moves
Balancing Technique:
- Use artificial light only when natural light < 5000 lux
- Morning artificial light + afternoon natural light combinations
- Seasonal adjustment ratios (summer 30% artificial, winter 70%)
4. Proactive Maintenance Schedule
Monthly Checklist:
- Fixture cleaning: Dust reduces LED output by 10%/year
- Spectrum testing: Use a prism to check for degraded diodes
- Electrical inspection: Frayed wires waste 5-15% energy
Annual Upgrades:
- Replace reflective materials
- Update to newer LED tech (efficiency improves ~10%/year)
- Reconfigure lighting layout based on plant growth patterns
Performance Tracking:
- Photograph plants weekly under consistent lighting
- Log energy usage vs. growth rates
- Compare yields season-to-season
Energy-Saving Quick Wins
✓ Replace magnetic ballasts with electronic versions (saves 20%)
✓ Install occupancy sensors in grow rooms
✓ Use pendant lights with adjustable heights
✓ Implement “light layering” (different intensities at various levels)
Real-World Results
Urban permaculturists report these improvements after optimization:
- 30% faster herb growth with reflective side lighting
- 40% energy reduction using smart controls
- 2x longer bulb life with proper heat management
By implementing these advanced techniques, you’ll achieve professional-level efficiency in your urban growing space. Remember that small, consistent improvements often yield greater long-term results than complete system overhauls.
Next Steps: Want to see these strategies in action? Our upcoming case studies will show how real urban growers achieved remarkable results with smart lighting approaches.
")
Case Studies: Successful Urban Permaculture Lighting Setups
Real-world examples prove that smart lighting solutions can transform urban growing spaces. These case studies showcase how different approaches achieve remarkable results while staying true to permaculture principles.
Case Study 1: The Solar-Powered Balcony Garden
Location: 12th-floor apartment, Chicago
Challenge: North-facing balcony with only 2 hours of direct sunlight
Solution: Off-grid solar LED system
Implementation:
- 2 × 50W flexible solar panels mounted on railing
- 100Ah battery with charge controller
- 4 × 15W waterproof LED grow bars (adjustable spectrum)
- Light-reflecting white paint on all surfaces
Results:
✓ Year-round production of kale, herbs, and strawberries
✓ 100% energy independence (zero electricity cost)
✓ 20% higher yields than predicted through optimal light timing
Key Innovation:
Automated “light recipes” that change with seasons:
- Summer: 14 hours of blue-dominant light
- Winter: 12 hours of full-spectrum with 30-minute sunrise simulation
Case Study 2: The Smart Vertical Farm
Location: Brooklyn basement (200 sq ft)
Challenge: No natural light, high electricity costs
Solution: AI-controlled LED vertical racks
System Components:
- 8-tier Tower Garden with 48 programmable LED panels
- Smart sensors monitoring PAR, temperature, and humidity
- Machine learning algorithm optimizing light recipes
- Renewable energy credits offsetting grid usage
Performance Metrics:
- 85% energy reduction vs. conventional grow lights
- 11 harvests/year of gourmet greens (vs. 3-4 outdoors)
- 30-second daily adjustment of all lights based on plant stress signals
Surprising Benefit:
The system discovered that alternating 30 minutes of red/blue light increased basil oil production by 22% – a pattern humans hadn’t identified.
Case Study 3: The Community Light-Sharing Network
Location: Portland neighborhood cooperative
Challenge: Uneven light distribution across 12 urban lots
Solution: Shared lighting infrastructure
Collaborative Model:
- Central solar charging station with battery bank
- Portable LED grow carts rotated between gardens
- “Light library” where members check out specialty lights:
- Flower-boosting LEDs (June-August)
- Mushroom cultivation lights (September-November)
- Seed-starting racks (February-April)
Community Impact:
- 63% reduction in duplicate equipment purchases
- Created neighborhood “light calendar” to coordinate needs
- Developed training program for DIY light maintenance
Unexpected Outcome:
The shared system became a social hub, with light rotation days turning into potluck gardening workshops.
Lessons Learned Across All Cases
- Adaptability beats perfection: Each successful system evolved through continuous small improvements
- Data transforms results: The most effective growers tracked metrics religiously
- Community knowledge multiplies success: Shared systems accelerated innovation
These examples prove that whether you’re working with 10 square feet or 10,000, strategic lighting solutions can unlock astonishing productivity while honoring permaculture ethics.
Your Turn: Which of these approaches could work in your space? Even small elements – like adding one solar panel or joining a light-sharing coop – can start your efficiency journey.
Next: We’ll wrap up with final thoughts and resources to continue your energy-efficient growing adventure.
Conclusion
Lighting the Way Forward: Your Urban Permaculture Journey
As we’ve explored throughout this guide, energy-efficient lighting isn’t just a growing accessory—it’s a transformative tool for urban permaculture. Let’s reflect on how these solutions can illuminate your sustainable gardening path.
Key Takeaways to Remember
- Right Light, Right Place
- Match lighting types to your space and plants’ needs
- LEDs and solar options offer the best efficiency for most urban growers
- Smart Systems Save More
- Automation and sensors prevent energy waste
- Proper maintenance extends equipment life
- Innovation Thrives in Community
- Shared systems and knowledge multiply success
- Every setup offers unique lessons
- Small Changes Create Big Impact
- Even basic reflectors or timers make a difference
- Energy savings compound season after season
Your Invitation to Experiment
The most successful urban growers treat their lighting systems as living experiments. Consider trying:
🌱 A seasonal light recipe – Adjust spectrums as days shorten
🔋 One solar addition – Start with a single panel
📊 Basic tracking – Note how plants respond to lighting changes
Remember: Thomas Edison tested 6,000 materials before perfecting the light bulb. Your “failed” experiments are just steps toward your ideal system.
Join the Conversation
We’d love to hear about your lighting journey:
💡 What energy-saving trick made the biggest difference for you?
🌿 Have you discovered an unexpected plant response to certain lights?
🔧 What DIY solution are you most proud of?
Share your experiences in the comments below—your story might spark someone else’s breakthrough!
Continue Your Bright Ideas
For those ready to dive deeper, explore these resources:
- [Link to solar lighting calculator]
- [Local urban permaculture groups]
- [Upcoming workshop on smart grow systems]
As urban permaculturists, we’re not just growing plants—we’re cultivating a sustainable future, one photon at a time. Your next harvest begins with turning on the right light.
What will you grow differently tomorrow?