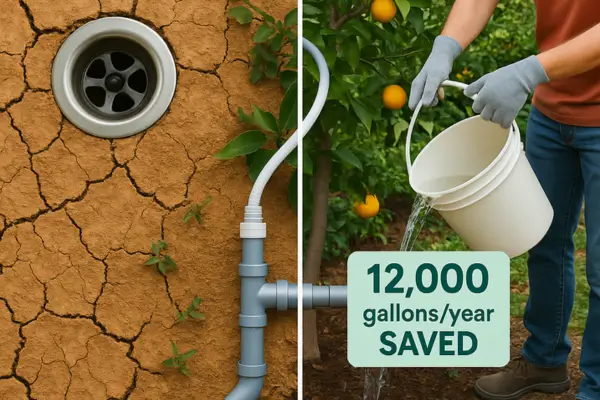
What if every drop of rain that fell on your home could slash your water bill, reduce strain on city drains, and keep your plants thriving? That’s the magic of rainwater harvesting—a game-changer for urbanites who want to live sustainably without sacrificing precious square footage.
As climate uncertainty grows and water restrictions become the norm, cities are waking up to the value of this ancient practice. But here’s the best part: You don’t need a sprawling backyard to participate. Modern rainwater systems are designed for tight corners—think apartment balconies, skinny side yards, or even under-deck spaces.
In this guide, we’ll cut through the clutter to spotlight the 5 most practical rainwater harvesting setups for small urban spaces, including:
✅ Budget-friendly picks (like repurposed barrels)
✅ Space-savvy innovations (hello, wall-mounted tanks!)
✅ “Why didn’t I do this sooner?” pro solutions (discreet underground systems)
By the end, you’ll know exactly which system aligns with your space, budget, and water goals. Let’s turn those rainy days into a free, eco-friendly resource!
1. Rain Barrels – Your Gateway to Water Independence
Best for: Eco-conscious beginners, urban gardeners, and renters looking for a low-commitment way to start harvesting rainwater.
The Urban Rain Catcher
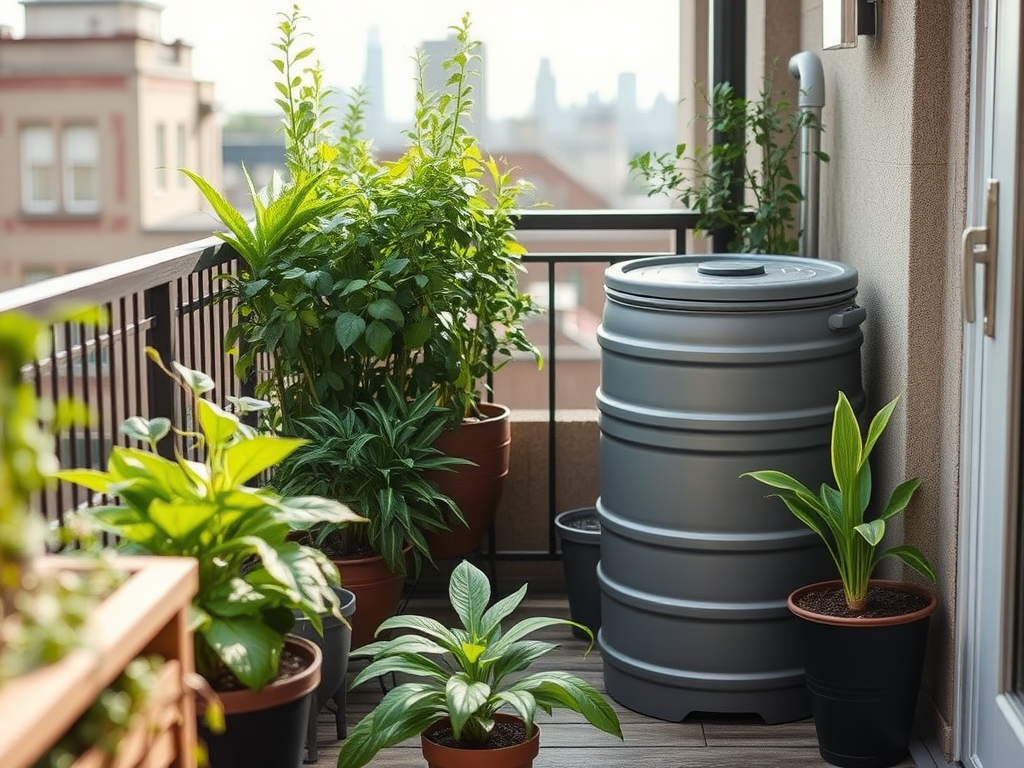
Imagine turning every rainfall into free water for your plants, windows, or even your bird bath—all with a simple barrel tucked in a corner. Rain barrels are the easiest entry point into water harvesting, requiring just a downspout and a level surface. Their compact footprint (most are about 24″ wide x 36″ tall) makes them perfect for squeezing into:
- Balcony corners
- Tiny back patios
- Narrow side yards
- Rooftop gardens
Why You’ll Love It:
✅ Shockingly Affordable – Basic models start at $80, or repurpose a food-grade barrel for under $50.
✅ Zero Expertise Needed – Most install in 30 minutes with just a downspout diverter (many kits include one).
✅ Eco-Double-Duty – Reduces your water bill while easing pressure on overloaded city storm drains.
Watch Out For:
⚠ The “First Rain Flush” – The initial water flow carries roof debris—smart barrels have filters to keep it clean.
⚠ Mosquito Surprises – Always choose models with tight lids and screens (or add your own).
Our Top 3 Urban Picks:
- EarthMinded RainBarrel – Slim 50-gallon design with planter top (disguises as garden decor!)
- Good Ideas Rain Wizard – Includes child-safe locking lid and patented overflow system
- Upcycled IBC Tote – Score a 275-gallon food-grade tank on Craigslist for mega storage
Pro Upgrade: Add a $15 spigot timer for automatic morning watering—your plants will thrive while you sleep in.
Sustainability Bonus: Every 1″ of rain on a 100 sq ft roof yields 62 gallons—that’s 600+ free gallons per summer in most cities!
2. Modular Water Tanks – The Scalable Solution for Space-Starved Urbanites
Best for: Urban gardeners, eco-conscious homeowners, and anyone who wants a customizable, space-efficient rainwater system.
Case Study: The Brooklyn Brownstone That Harvested 1,500 Gallons in a 4’x6′ Space
When Sarah and Mark renovated their 20-foot-wide brownstone, they wanted a rainwater system that could fit their narrow side yard (just 4 feet wide). Their solution? Stackable 265-gallon Atlas Tanks arranged in a vertical column.
- Setup: Three tanks stacked vertically (795 gallons total) + two more alongside (1,590 gallons combined).
- Space Used: Only 4′ (W) x 6′ (L) x 8′ (H)—smaller than a coat closet!
- Water Use: Supplies their rooftop garden and reduces stormwater runoff fines by 40%.
- Cost: ~$2,800 installed (vs. $6,000+ for a traditional cistern).
“We didn’t have space for a big tank, but modular let us build capacity over time. Now we never use city water for our plants!” — Sarah K., Brooklyn
Plastic vs. Polypropylene: Which Tank Material Wins for Cities?
| Feature | Polyethylene (Plastic) | Polypropylene (Premium) |
| Cost | $0.80-$1.20/gal | $1.50-$2.50/gal |
| Lifespan | 10-15 years | 25+ years |
| UV Resistance | Prone to brittling | Won’t degrade |
| Weight | Lighter | Heavier (needs support) |
| Best For | Renters, temp setups | Homeowners, long-term |
Urban Pick: Polypropylene for permanent setups (worth the investment), plastic for renters.
DIY Reinforcement Tricks for Heavy Stacks
Modular tanks are safe to stack up to 3 high—but if you’re going taller or placing on a rooftop, try these pro hacks:
- The Plywood Sandwich
- Place ½” pressure-treated plywood between each tank tier to distribute weight evenly.
- Ratchet Strap Security
- Wrap heavy-duty straps around the entire stack and anchor to wall studs or deck posts.
- Concrete Paver Base
- Set the bottom tank on 2″ compacted gravel + pavers to prevent settling.
- The “Ladder Bracket” Trick (for wall-adjacent stacks)
- Mount steel L-brackets to the wall at each tank seam for lateral support.
Why Urbanites Love Modular Tanks
✅ Space Magic – Fit 500+ gallons in the footprint of a refrigerator.
✅ Future-Proof – Add tanks during droughts or garden expansions.
✅ No More Muddy Side Yards – Redirects roof runoff that erodes urban soil.
Pro Tip: Pair with a smart irrigation controller (like Rachio) to auto-use rainwater before tapping city supply.
3. Wall-Mounted Rainwater Systems – The Space-Saving Vertical Garden Hack
Best for: Apartment dwellers, townhouse owners, and anyone with more wall space than floor space.
The Skinny on Vertical Rainwater Harvesting
When every square foot counts, going vertical is the ultimate urban water hack. These slim, wall-hugging tanks (as narrow as 12″) turn unused walls into water storage:
- Balcony walls (even in high-rises)
- Side-of-garage installations
- Between windows on narrow row houses
- Above utility areas (like outdoor laundry spaces)
Why These Are a City Dweller’s Dream
✅ Zero Footprint – Literally takes up no floor space.
✅ Designer-Friendly – Many models come in colors (like slate gray or terracotta) to blend with façades.
✅ Gravity Advantage – Wall height creates natural water pressure for drip irrigation.
Watch Out For:
⚠ Weight Limits – A full 50-gallon tank = ~400 lbs—must attach to studs, not just siding.
⚠ Plumbing Know-How – Some systems need drilled overflow pipes (check lease agreements!).
Top 3 Wall-Mounted Systems
- AquaCera WallTank (30-100 gal, powder-coated steel, modern look)
- Green Wall Water’s Vertical Cask (45 gal, modular planters built in)
- DIY Corrugated Metal – Upcycle food-grade IBC totes cut vertically (~$150 for 80 gal)
Pro Installation Tips for Renters & Owners
- The “Faux Trellis” Trick – Disguise tanks with climbing plants (like jasmine or ivy).
- Renter-Friendly Version – Use a removable French cleat system (no permanent holes).
- Insulate for Winter – Wrap tanks in bubble foil insulation to prevent freezing.
Real-World Impact: A single 60-gallon wall tank can provide 2 weeks’ worth of water for a 4’x8′ balcony garden in summer.
4. Underground Cisterns – The Invisible Water Reservoir for Urban Homes
Best for: Homeowners who want serious water storage without sacrificing precious outdoor space.
The Stealth Water Tank You Never See (But Always Use)
While most rainwater systems sit on your property, underground cisterns work beneath it—turning unused dirt into a massive water bank. These hidden workhorses are ideal for:
- Postage-stamp yards (tanks install under patios or walkways)
- Driveway margins (narrow trenches along paved edges)
- Under deck voids (that awkward 3-foot crawl space)
Real-World Example: A Toronto homeowner buried a 1,500-gallon tank under their 10’x6′ side yard—now supplies all their garden irrigation and toilet flushing.
Why Go Underground?
✅ Space Genius – Stores 3-5x more water than above-ground systems in the same footprint
✅ Aesthetic Win – Zero visual impact (HOA-approved!)
✅ Year-Round Use – Soil insulates against freezing (with proper burial depth)
✅ Mosquito-Proof – No open water = no breeding ground
The Reality Check:
⚠ $$$ Installation – $3-$6 per gallon (vs. $0.50-$2 for barrels)
⚠ Excavation Dance – Requires digging (check for utility lines!)
⚠ Pumping Needed – Requires a sump pump or pressure system
Underground Options Compared
| Type | Capacity | Best For | DIY-Friendly? |
| Rotomolded Plastic | 300-5,000 gal | Driveway edges | ✅ (with equipment) |
| Concrete | 1,000-10,000 gal | Whole-house systems | ❌ (pro install) |
| Modular Bladders | 500-20,000 gal | Under decks | ✅ (no heavy machinery) |
Urban Pick: Slimline rotomolded tanks (like Norwesco 300-gallon) for narrow side yards.
How to Cut Costs Without Cutting Corners
- The “Dig-It-Yourself” Discount
- Rent a mini excavator ($200/day) instead of hiring full excavation.
- Rainwater + AC Condensate Combo
- Plumb your air conditioner’s drip line into the cistern—adds 5-20 gallons/day free!
- Municipal Rebate Hack
- Cities like Tucson and Seattle offer $0.50-$1 per gallon rebates for cisterns.
- The “Parking Pad” Trick
- Install under a new gravel parking spot—kills two birds with one dig.
Winter-Proofing Your Buried Treasure
❄️ Depth Matters – Bury below frost line (varies by region)
❄️ Concrete Anchor – Prevents frost heave in clay soils
❄️ Vented Loop – Prevents vacuum lock when draining
Pro Tip: Add a first-flush diverter before burial—you can’t clean it later!
Is Underground Right for You?
✔ Ideal if…
- You have >$2,000 budget
- Your soil drains well (no clay swamps)
- You hate the look of tanks
✖ Think twice if…
- You rent or might move soon
- Your yard has bedrock or giant tree roots
Why Underground Cisterns Are Worth Considering
- Dead Space to Water Security
That unused strip along your driveway or under your deck? It could hold months’ worth of irrigation water—completely invisible.
- Budget-Friendly Options Exist
While pricier than barrels, strategic choices like bladders or shared excavation projects with neighbors can cut costs by 30-50%.
- Clarity Through Comparison
Our tank comparison table helps you avoid overbuying—a 300-gallon slimline tank often meets urban needs without unnecessary expense.
- Built for All Seasons
Properly buried systems work year-round, even in freezing climates (unlike exposed barrels that turn into ice blocks).
5. Green Roofs with Integrated Rainwater Harvesting – Nature’s Sponge for Urban Roofs
Best for: Eco-conscious homeowners, urban farmers, and anyone who wants their roof to cool their home, capture rain, and grow food—all at once.
Why Green Roofs Are the Ultimate Urban Rainwater Solution
A green roof isn’t just a garden—it’s a living water management system. Here’s how it works:
- Rainwater falls onto the planted roof.
- Soil and plants absorb and filter the water.
- Excess water drains into a storage tank for later irrigation.
- Evaporation cools the building naturally.
Bonus: Reduces urban “heat island” effect and supports pollinators like bees!
Pros & Cons at a Glance
✅ Pros:
✔ Cuts Energy Bills – Acts as natural insulation (up to 25% cooling savings in summer).
✔ Reduces Flood Risk – Absorbs 50-90% of rainfall, easing pressure on city drains.
✔ Grows Free Food – Perfect for herbs, greens, or even strawberries.
❌ Cons:
⚠ Structural Limits – Requires a strong roof (check with an engineer first!).
⚠ Higher Upfront Cost – Ranges from $15–$40/sq ft installed.
⚠ Maintenance Needed – Weeding, irrigation, and occasional soil top-ups.
How to Choose the Right Green Roof System
1. Assess Your Space
- Flat or low-slope roofs work best (under 10° pitch).
- Weight capacity? A lightweight “extensive” green roof (~15 lbs/sq ft) suits most homes.
2. Set a Budget
- DIY (Tray Systems): $10–$20/sq ft (e.g., LiveRoof modules).
- Full Professional Install: $25–$40/sq ft (includes irrigation & waterproofing).
3. Check Local Rainfall
- Wet climates: Opt for deeper soil (4–6″) to handle heavy rain.
- Dry climates: Include drip irrigation fed by stored rainwater.
4. Define Your Use
- Just for runoff control? A simple sedum roof works.
- Want to grow food? Choose deeper soil (6–12″) and drought-resistant veggies.
Installation Tips for a Leak-Proof, Low-Maintenance System
Step 1: Waterproofing is Key
- Use a root-resistant membrane (EPDM rubber is best).
- Install a drainage layer (like gravel or plastic egg-crate panels).
Step 2: Pick the Right Plants
- Low-maintenance picks: Sedum, thyme, chives, or native grasses.
- Avoid invasive species (like mint or bamboo).
Step 3: Integrate Rainwater Storage
- Place a slim cistern under the roof edge to collect overflow.
- Use a small pump for irrigation (or let gravity feed drip lines).
Maintenance Made Easy
🔹 Seasonal Checkups:
- Spring: Remove debris, add compost.
- Summer: Water during droughts (using stored rainwater!).
- Fall: Trim plants, clear drains.
🔹 Keep It Clean:
- Install a first-flush diverter to keep tank water clean.
- Use mosquito dunks if storing water long-term.
Is a Green Roof Right for You?
✔ YES if…
- You have a strong, flat roof.
- You want energy savings + food production.
- Your city offers stormwater tax credits.
✖ NO if…
- Your roof can’t handle extra weight.
- You aren’t up for light maintenance.
Final Thought
A green roof with rainwater harvesting doesn’t just save water—it transforms your home into a living ecosystem. Start small with a modular tray system, and watch your roof become the most productive part of your urban oasis!
Need More Guidance?
- Check out local green roof grants (cities like Toronto & NYC offer incentives).
- Check out “The Urban Green Roof Handbook” for DIY plans.
Green Roof Rainwater Systems: Plant Guide + Cost/Savings Breakdown
Best Plants for Green Roofs (By Climate)
Low-maintenance, drought-resistant picks that thrive in shallow soil
| Climate | Best Plants | Why They Work |
| Hot & Dry | • Sedum (Stonecrop) • Agave • Lavender | Thrive with little water; reflect heat |
| Cold Winters | • Sempervivum • Arctic Moss • Chives | Frost-resistant; prevent soil erosion |
| Wet & Humid | • Carex Grass • Blue Iris • Mint* | Tolerate heavy rain; *contain mint in pots |
| Coastal | • Sea Thrift • Yarrow • Beach Strawberry | Salt-tolerant; shallow roots |
Pro Tip: Mix 3-4 species for biodiversity. Avoid invasive plants like bamboo!
Cost vs. Savings Breakdown
For a 500 sq ft green roof with rainwater storage
| Cost Factor | DIY (Extensive) | Pro Install (Intensive) |
| Upfront Cost | $5,000–$10,000 | $12,500–$20,000 |
| Annual Maintenance | $100–$300 | $500–$1,000 |
| Savings | Yearly Value | Notes |
| Energy (Cooling) | $75–$200 | Less AC use in summer |
| Stormwater Fees | $50–$150 | Many cities charge runoff taxes |
| Food Production | $100–$400 | Herbs/veggies for 2–4 people |
| Roof Lifespan 2X | Saves $10,000+ | Protects roofing materials |
Payback Period:
- DIY: 7–12 years
- Pro Install: 15–25 years
Key Insight: Pair with solar panels to boost savings—green roofs improve panel efficiency by 10–15% through cooling!
Hybrid System Hack
Can’t commit to a full green roof? Try:
- “Green Roof + Rain Barrel” Combo
- Plant a 3’x5′ sedum mat near a downspout → drain excess into a barrel.
- Modular “Green Pockets”
- Use fabric planters (like Woolly Pockets) on sturdy roof sections.
Final Checklist Before You Start
☑️ Get a structural assessment (critical!)
☑️ Check local rebates (e.g., NYC offers $15/sq ft)
☑️ Start small—test a 50 sq ft section first
Want a vendor list for pre-planted trays? Or a case study from your city?
Need More Help?
🔹 Pre-Planted Tray Vendors (North America):
- LiveRoof (Best for modular sedum systems)
- GreenGrid (Lightweight recycled plastic trays)
- Roofmeadow (Custom native plant mixes)
🔹 City-Specific Case Studies:
- Portland, OR: See how a 200 sq ft roof cut stormwater fees by 60% [Portland Green Roof Program]
- Toronto, ON: Café’s rooftop farm yields $3,000/year in produce [Toronto Green Roof Bylaw]
- Chicago, IL: How a condo reduced AC costs by 30% [Chicago City Hall Case Study]
(Reply with your city—we’ll share a local example!)
Harvest Rain, Not Regrets
You don’t need a farm to become a water-saving hero—just a smart system that fits your urban jungle. Let’s recap your options:
- Rain Barrels – The no-brainer starter kit ($)
- Modular Tanks – Grow-as-you-go flexibility ($$)
- Wall-Mounted Systems – Space-savvy vertical magic ($$)
- Underground Cisterns – The invisible giants ($$$)
- Green Roofs – Where ecology meets function ($$-$$$)
Every drop you harvest fights water scarcity, cuts bills, and greens your city. The hardest part? Just starting.
So—which system whispers to your space?
👉 Is it the sleek wall tank that’ll hide behind your balcony herbs?
👉 Or the buried cistern that’ll secretly water your garden for years?
Tell us in the comments—we’ll help you brainstorm! (Or tag a friend who needs this.)
P.S. Share a photo of your setup—we’ll feature the best DIYs next month! 🌧️💧